We build a pond with our own hands

To create a decorative pond on your plot, you will need:
- “Laguna DIY Pond” installation kit, which contains everything required to create a pond, namely geomembrane, geotextile, a set of accessories and layout tools, as well as a detailed step-by-step manual with a planting plan from leading landscape designers;
- Shovels and a wheelbarrow for removing excavated soil;
- Some decorative materials for styling the coastal zone (stones and boulders of various sizes and shapes);
- Plants for planting in the coastal zone and aquatic plants specifically for the pond. Detailed recommendations on styling the shoreline and plant arrangement schemes are provided in the manual included with the “Laguna DIY Pond” installation kit.
Six Steps to Create a Pond:
- Select a site for the pond and determine its shape.
- Plan the area surrounding the future pond.
- Mark the layout and excavate the pit.
- Line the excavated pit with geotextile and geomembrane.
- Fill the pond with water.
- Design the pond shoreline and the surrounding territory, and plant the vegetation.
Step 1. Selecting the Right Location for the Pond
In the long run, this will help you avoid many issues during the operation of your custom pond and significantly simplify its maintenance. There are several straightforward rules to follow when choosing a location for a decorative pond:
- Do not place the decorative body of water under trees—falling leaves will continuously contaminate the water, and plant roots can damage the waterproofing liner.
- Sunlight should not strike the water surface for more than 6 hours per day. Otherwise, solar radiation will trigger rapid reproduction of algae and bacteria, causing the water to bloom quickly.
- However, solar rays are still necessary. If there is a lack of light, the growth of the plants decorating the pond will slow down significantly.
- Ensure that utilities are close to your future pond. This makes it convenient to fill the pond with water and top it up later, as water evaporates during summer and the water level will drop. Additionally, you may need electricity if you plan to install a water filtration system, add pond lighting, or illuminate a relaxation area next to it. Therefore, arrange for utility access in advance.
Choosing the Pond Shape:
The most popular option for a country house is a free-form pond. Such ponds are a perfect match for plots with a natural layout. They are the easiest to integrate into the surrounding landscape. Because they resemble natural conditions as closely as possible, benches for relaxation are usually installed next to them, and fruit trees or vegetable crops can grow nearby. There are no strict design requirements—complete freedom of action.
Ponds with a regular geometric shape (circle, square, rectangle) are an option for fans of urban landscapes. Usually, such a pond requires a highly manicured garden plot with a minimalist landscape design.
In any case, with our “Laguna DIY Pond” kit, you can create a pond of any shape, or choose one of the 7 designs suggested in the kit.

Step 2. Planning
Before beginning pond construction, it is necessary to plan the zone around it. It is advisable to sketch, at least schematically, a layout of the territory around the water body—planning the paths, the recreation area, and the planting scheme. Only after this can you compile a detailed cost estimate and proceed to work. Such a layout will truly help you create a cozy and beautiful spot with a water feature on your land plot.

Step 3. Marking the Layout and Excavating the Pit
- First, mark out the contours of the future pond on the terrain, giving it your desired shape and depth. We recommend making the pond at least 1 meter deep so that it does not overheat significantly in summer, avoiding water bloom, and does not freeze solid in winter.
- Next, decide what to do with the soil that will be removed from the pit during excavation.
- Begin digging the pit from the edges toward the center. During excavation, alternate terraces and “shelves”—this gives the banks stability, preventing the soil from collapsing. The width of a “shelf” should be about 30 cm, with a slope angle of 45-50 degrees. Additionally, this will allow you to plant different types of vegetation—both shallow-water and deep-water varieties.
- In terms of depth, it is recommended to divide the pond into three zones: a zone for coastal plants up to 10 cm, a shallow-water zone from 10 to 40 cm, and a deep-water zone starting from 40 cm. If you plan to grow water lilies (nymphaeas), they are planted specifically in the deep-water zone.
- Level and clear the bottom of the pit from tree roots and stones that could damage the liner. Dig a small trench along its perimeter where the liner will be securely anchored.
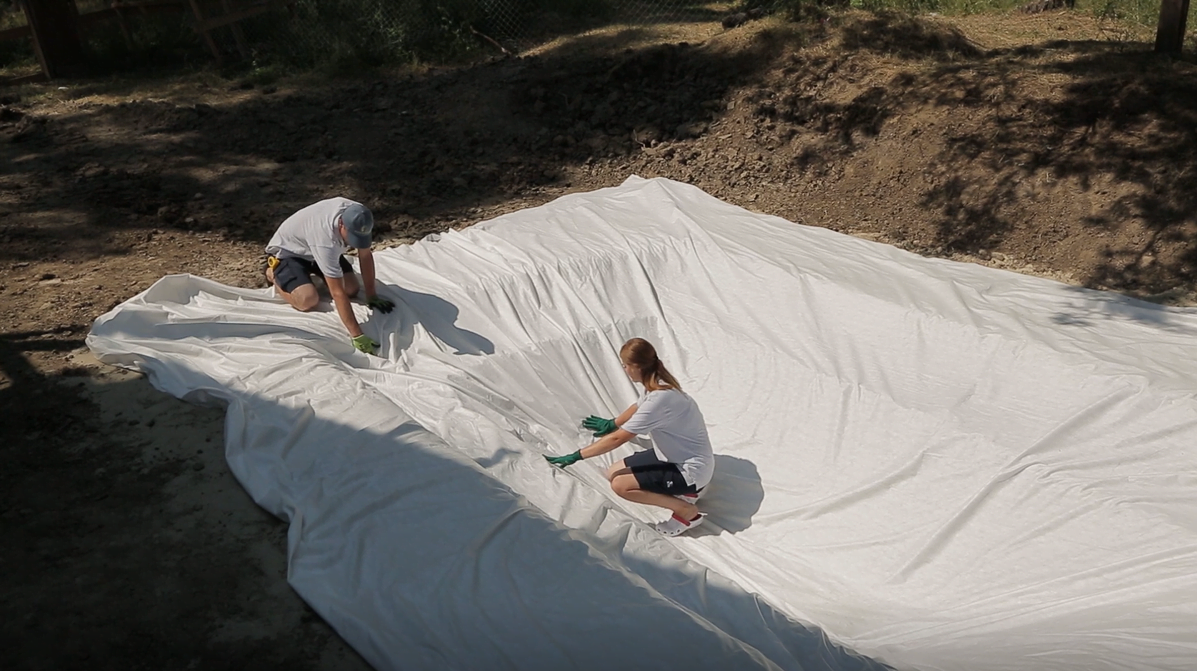
Step 4. Laying the Geotextile and Pond Liner (Geomembrane)
Keep the liner outdoors for 2 hours so it warms up in the sun—this will make it easier to lay down. Line the bottom of the pond pit with the geotextile fabric first. After that, line the pond with the specialized pond liner. Try to distribute the liner as evenly as possible, avoiding heavy folds and wrinkles. If feasible, install a water filtration system at this stage.
A widespread mistake is using a regular plastic film during pond construction.
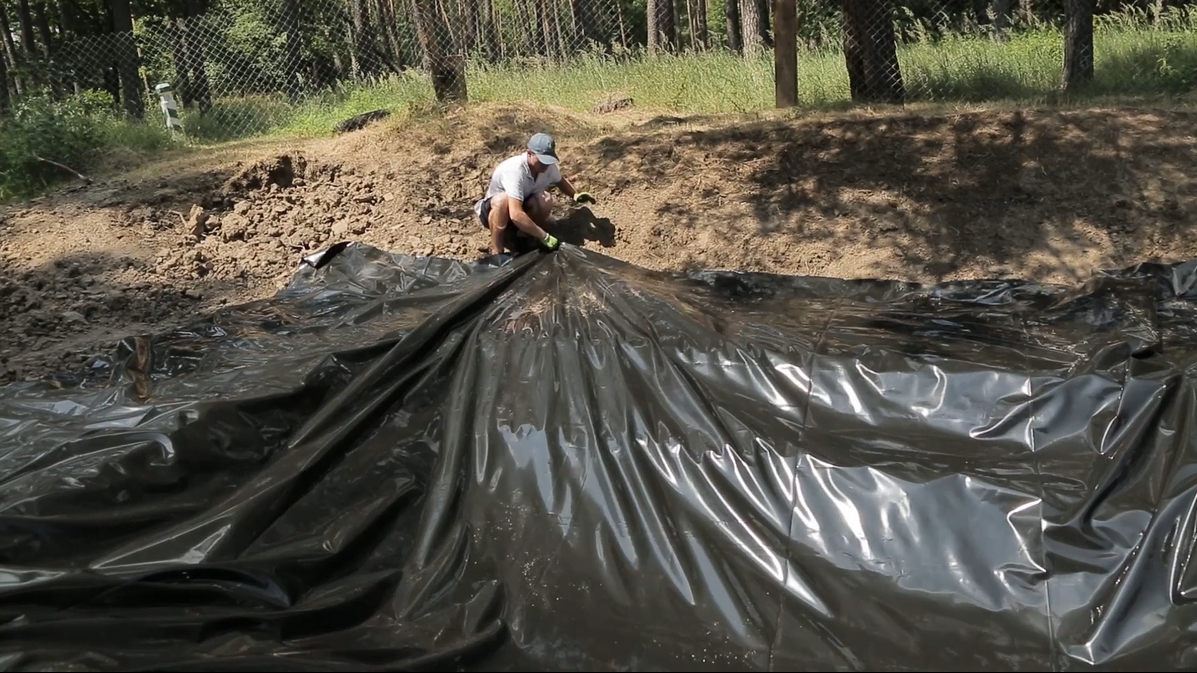
If you do not want to repair or completely rebuild your new pond in the coming months due to poor-quality waterproofing causing water leaks, we highly recommend using exclusively specialized liner, known as a geomembrane. This exact type of film is engineered specifically for waterproofing and building ponds or pools.
For our “Laguna DIY Pond” installation kit, we selected a high-quality waterproofing geomembrane manufactured from linear low-density polyethylene (LLDPE) with a thickness of 350 µm. This is a lightweight, soft, and flexible material, yet it remains exceptionally strong and resistant to tearing and deformation. It handles low temperatures perfectly. The material is completely impermeable to vapor and water, ensuring optimal hydrostatic containment.
Thanks to a new, advanced geomembrane formulation developed by our engineers, we succeeded in reducing the thickness of the material from 500 µm to 350 µm, thereby lowering the weight without sacrificing mechanical strength. Our engineers achieved greater resistance to tearing and puncture. Additionally, due to the lower thickness and enhanced elasticity, the material has become much easier to handle—it is simpler to line the pit with it while avoiding folds and wrinkles. Our geomembrane is flexible and elastic, allowing it to be installed even on complex, uneven surfaces. Carbon black stabilization protects the pond liner from UV radiation, preventing it from degrading under the sun. Consequently, a Laguna pond will serve you for at least 7 years.

Step 5. Filling the Pit with Water
Ideally, do not fill the pond with water immediately; it is better to let the material sit dry for about 24 hours so it settles into the correct shape. Fill the pond with water gradually—by one-third every 2-3 hours until completely full. This is necessary so that the liner stretches under the weight of the water progressively.
After filling the pond with water, trim the excess liner along the edges and secure it using the pegs provided in the “Laguna DIY Pond” kit. Bury the edges of the liner with soil or sand and proceed to design the shoreline.
Step 6. Pond Decorating and Styling
Place stones of various sizes along the shoreline and plant marsh vegetation for the edge zone. Place shallow-water plants in pots onto the pond shelves and submerge the deep-water plants. Detailed recommendations on shoreline decoration are available in the manual included with the “Laguna DIY Pond” kit.

Congratulations! Your pond is ready. It’s time to enjoy the results of your labor—your very own backyard pond and updated landscape.